Showing posts with label Dinner. Show all posts

Monday, February 7, 2011

Polenta "Pizza" Crust with Sun-dried Tomatoes, Chicken, and Peppers; Menu Plan for 2/6/11 - 2/12/11


 I think it's safe to say that all of us who don't eat wheat or dairy miss pizza terribly.  Whether it's a thick, chewy crust you adore, or a thin, crispy one, it's hard to find a wheat-free equivalent that: isn't crumbly, doesn't stink like beans, or isn't like eating cardboard.  

 
While this polenta crust is no pizza dough equivalent, it is a tasty base for toppings and your choice of non-dairy cheese.  Unfortunately, without gluten, I don't think I will ever enjoy pizza the same way.  Instead of pining for food I can't have and being completely unsatisfied or grossed out by substitutions (sometimes very fake and processed), why not try something that is just delicious to begin with?  Polenta? Yes, it's delicious!  Sun-dried tomatoes?  Yup, love those, too!  Bell peppers?  My favourite topping!  Goat Cheese?  Yes, please!

I used a Silpat to line to baking sheet but parchment paper cut to fit the pan, covering the bottom and sides will work well, too.  Do NOT place polenta directly on a non-stick pan.  In my experience, the polenta has pulled the non-stick coating (the gray-ish stuff) off the pan.  Not only is your pan ruined, but so is your dinner.


For the "sauce" I adapted a sun-dried tomato jam recipe I made in the past.  It's a pretty rich-tasting jam so I decided to add shredded chicken and some bell peppers.  The husband was advised to avoid onions by the Naturopath, so we omitted those (see here for the original recipe) even though they really do make the jam.


For the chicken, we found a great deal on bone-in, skin-on chicken breasts at our local supermarket.  As much as love a crispy skin chicken dish, we are trying to watch our fat intake.  I used this method to cook the chicken and saved the fatty chicken water (sounds appetizing, I know) to use in a veggie soup later on.  It's still chicken fat, but at least it'll be spread out over several bowls of soup, rather than consumed by us in one meal.


The verdict:  Tasty!  The tartness of the sun-dried tomatoes complemented the creaminess of the polenta well, and the water from the sun-dried tomato "jam" kept the chicken pieces from being too dry.  The only downside was that this is not a "pizza" that you can pick up and eat with your hands.  The center of the pizza gets soggy pretty easily, so make sure the crust is baked well, and is firm before you put toppings on.  I think I will make several smaller pizzas next time to avoid this.


Polenta Pizza Crust
adapted from Cooks.com

1 cup corn meal
3 cups water
1/2 tsp sea salt
1 tbsp olive oil

Toppings 
Sun-dried tomato jam adapted from Everyday Italian


8 oz. jar sun-dried tomatoes packed in oil, finely chopped (reserve 1 tbsp of the oil)
1 garlic clove, finely chopped
1 tbsp olive oil
1 tbsp sugar
1/4 cup water
1/4 cup red wine vinegar
1 tsp chopped fresh thyme leaves
salt and pepper to taste


Cooked, shredded chicken (I used the meat from 2 large chicken breasts)
Chopped bell peppers (I used each of yellow and orange)

For the crust:

Preheat the oven to 375 F. Put a Silpat on a cookie sheet (or parchment paper to cover the bottom and sides of pan).
Stir the cornmeal, water, and salt together in a medium saucepan. Heat over medium-high heat, stirring constantly, until mixture comes to a boil and thickens enough to pull away from the sides of the pan. Remove from heat and stir in the olive oil.

Let cool for about 2 minutes, then spread evenly over the Silpat with a rubber spatula. 

Bake for 15 minutes, or until set.

For the toppings: 

Place a medium saucepan over medium heat. Add the chopped sun-dried tomatoes, 1 tablespoon of the reserved sun-dried tomato oil, olive oil, and garlic. Stir and cook until mixture starts to bubble slightly. Add the sugar, vinegar, water, and thyme, stirring well until mixture starts to bubble again.  Add shredded chicken and toss to ensure that all the chicken bits are covered in the tomato mixture.

Spread mixture evenly over polenta crust and top with chopped peppers and cheese.  Bake in oven at 375 F, or until cheese is melted.

This week's menu:
You will notice that I have a snack and a late lunch from Wednesday onwards, as I'll be at a training session that finishes at about 1:30 PM.  I plan on having a snack (S) at the training and a small late lunch (LL) when I get home.

Monday: B-Oatmeal and apple; L-  ; D-Polenta Pizza with steamed broccoli
Tuesday: B-Oatmeal; L-leftover Polenta Pizza and broccoli; D-Vegetable lentil quinoa soup
Wednesday: B-Oatmeal; S-hummus, peppers, crackers; LL-leftover soup; D-Leftover pizza
Thursday: B-Oatmeal; S-Banana ; LL- Leftover soup  D- out for friend's birthday
Friday: B- Oatmeal; S-banana and spelt cookie; LL- Bell pepper and quinoa soup ; D- Out for sushi!
Saturday: B-Mango smoothie; L- Out for Thai food; D-Husband's fried chicken, mashed potatoes, and broccoli

Sunday, January 23, 2011

Slow Cooker Variation on Chicken Adobo and Weekly Menu


I know it's boring to just read weekly menus with no recipes or recipe reviews so I will start (or try) to post recipes of our meals (if we don't succumb to temptation and go out somewhere).

Sunday is the start of a new menu week, and tonight's meal is a variation on Chicken Adobo. I think I've only had this dish once (at a food court), and with all the variations I've seen online, I had no idea what "authentic" Chicken Adobo should taste like or if the recipe I'm using (Real Simple, February 2011 issue) is anything like the real thing. I subbed in carrots and celery for the onions (this could have drastically affected the flavour), and some napa and spinach in place of the bok choy.

I'm trying to make our meals more vegetable-centered, rather than meat, which is why I reduced the amount of chicken to less than half of what the recipe calls for. Japanese cooking (which what I grew up with) mostly uses meat to add flavour dishes, rather than having it be the main thing.

Chicken Adobo with Bok Choy
from Real Simple, February 2011 issue

2 medium onions, sliced (I used 4 stalks of celery, chopped)
4 garlic gloves, smashed
2/3 cup apple cider vinegar
1/3 cup low sodium soy sauce (I used wheat-free tamari)
1 tablespoon brown sugar
1 bay leaf
black pepper
8 skinless bone-in chicken thighs, about 1 3/4 pounds (I used 2 boneless thighs and one breast)
2 teaspoons of paprika
1 cup long grain white rice (I used brown rice)
1 large head bok choy, cut into 1 inch strips (I used 2 large handfuls of spinach and 1/4 head of napa cabbage)
2 scallions, thinly sliced (omitted)
(I added 1 large chopped carrot)

In a 5-to-6 quart slow cooker, combine the onions (or celery and carrots), garlic, vinegar, soy sauce, brown sugar, bay leaf, and 1/4 tsp pepper. Place the chicken on top and sprinkle with the paprika.

Cook until the chicken and onions (if using) are tender, on low for 7 to 8 hours or on high for 4 to 5 hours.

Cook rice according to instructions.

Ten minutes before serving, if the slow cooker is on the low setting, turn it to high. Gently fold the bok choy (or spinach and napa) into the chicken and cook, covered until tender, 3 to 5 minutes. Serve with the rice and sprinkle with the scallions.

The verdict: Pulled chicken-like consistency in a tangy (soupy) sauce. I put the carrots and celery in at the beginning, which tasted fine, but as you can imagine, ended up pretty mushy. You see, here's the thing. I love the taste and flavour onions add to dishes, but not the long, stringy, slimy things that end up in my food when I cook them. If I do use them, I usually chop them up very finely so they blend in well with whatever it is I'm making. Since Adobo sauce is quite thin in consistency, I knew I would end up with that stringy, slimy stuff. I knew the chicken needed something to "sit" on in the crockpot. Enter the carrot and celery.

Next time I make this, I will add maybe half an onion, finely diced, place the chicken on top, and then definitely add the carrot 30 minutes before time's up, the celery 15 minutes before, and then the bok choy or napa or whatever it is, 5 minutes before (as per original recipe). Also, the spinach, while tasting lovely, did not make this dish look very pretty. If you've got eaters who are nit-pickers on presentation, you may want to reconsider...


As for this week's menu, here it is:

Sunday: B-a kiwi and a banana (I had an early morning thing), 2nd B (after the thing)-1 over-easy egg, hash browns, and 2 pieces of bacon (at a restaurant); L-full from 2nd B so had a banana, mango, and cashew milk smoothie; D-Chicken Adobo on brown rice.

Monday: B-a kiwi and a banana (another early morning thing); L-leftover lentil chili (yes, eating up that last little bit!); D-Leftover Chicken Adobo on brown rice.

Tuesday: B-Oatmeal (no early morning thing, hurray!); L-Leftover Chicken Adobo; D-Out for Pho

Wednesday: B-Oatmeal; L-Chicken adobo; D-Out for sushi!

Thursday: B-Oatmeal; L- Rice, pickled plum and seasoned seaweed; D-Veggie stir-fry

Friday: B-Oatmeal; L-Chicken salad on crackers; D-Out for dinner at a restaurant but we're having Peking Duck for sure!

Saturday: B-Oatmeal; L-spelt toast, hummus, veggies, goat yogurt; D-Sushi

Wednesday, November 17, 2010

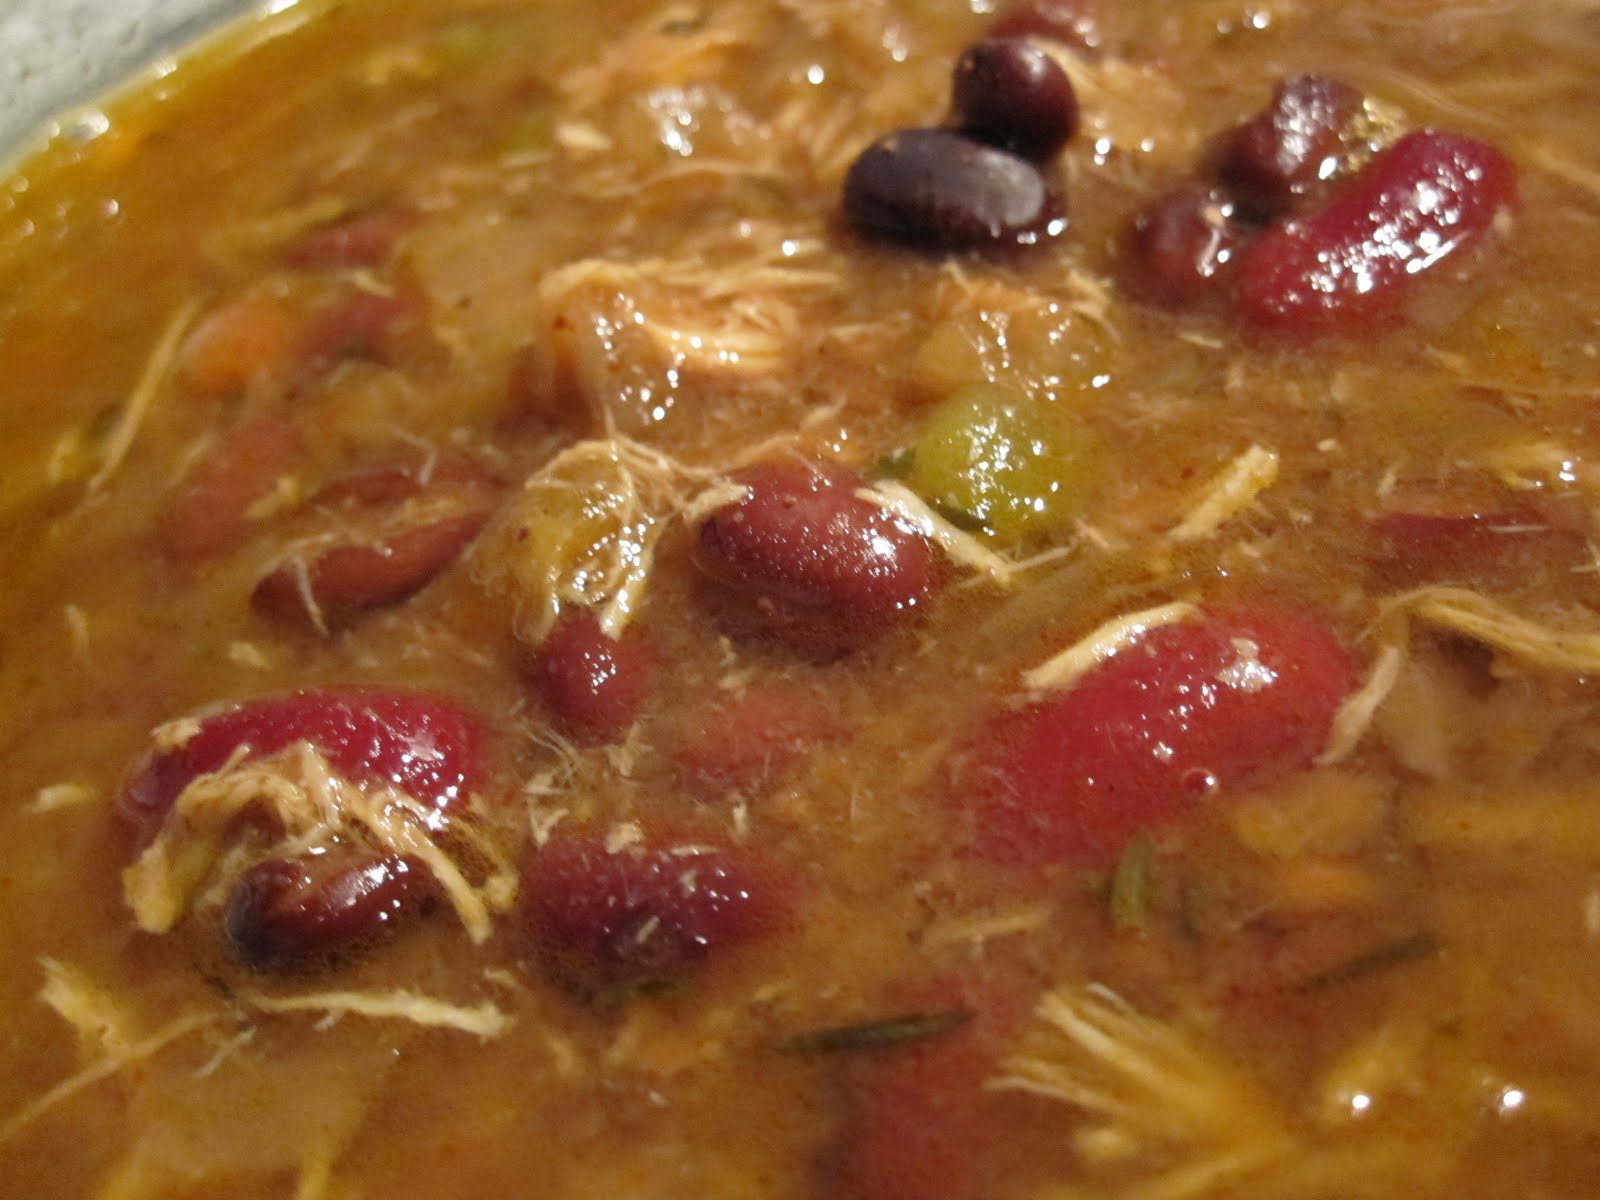
Jerk Chicken Chili-Soup in the Crockpot


This chili-soup, (I added the -soup part because I didn't add any cornstarch to thicken it. I don't mind it being soupy at all) is surprisingly warming on these chilly November days, considering Jerk is a Caribbean flavoring. The husband and I started taking off our sweatshirts as we tucked into this soup, as the chili-like flavors heated up our cores. The rich smell of cinnamon will fill your kitchen throughout the day, as this soup simmers away in the crockpot.

The soup looks watery at first, but once the chicken is shredded, it definitely thickens up. Because the chicken cooked in the crockpot, it comes apart very easily with a squish of the ladle. You could also take the chicken out and shred with 2 forks but I found that the chicken was falling apart so much as I tried to pick the pieces out, that I just stopped trying. I used water instead of chicken broth and I found the soup to be well-flavored. I've had a few over-salting incidents recently, so I decided with this one, to leave the salt out completely, and just add as much or as little salt as we like at the table.

I made some changes to this recipe to fit what I had in the kitchen. One major change is that I put a raw chicken breast and thigh in the crockpot. I know some people are hesitant to do this, as the chicken will stay at a low temperature for a long period of time. I'm not one to worry too much about that, so this truly is your judgment call. The original recipe suggests using a rotisserie chicken, shredded of its meat but I kind of thought it was a waste to go out and buy a rotisserie chicken, just to rip meat off of it and put it in a soup. I would have rather used the seasoned chicken to make sandwiches or Vietnamese-style salad rolls.

I also used 3 fresh tomatoes instead of a can of diced ones. I had three ripe ones sitting on the counter so that was a no-brainer. For the beans, I just used what I had in the pantry. I've added my changes in parenthesis.

We found this soup to be quite mild. It could definitely be kicked up with cayenne or more jalapenos! It's the perfect winter dish, which will definitely be made again!!


Jerk Chicken Chili (Soup in the Crockpot)
4-6 servings
source: Pam Anderson, Perfect One-Dish Dinners

1 tbsp olive oil
1 large yellow onion, chopped
1 yellow bell pepper, chopped (I used green)
3 tbsp chili powder
1 1/2 tsp dried thyme
1 tsp ground cinnamon
1/2 tsp ground allspice
1 large rotisserie chicken, meat removed and shredded (about 6 cups) (I used 1 breast and 1 thigh)
4 cups chicken broth (I used water)
1 can (14 oz) diced tomatoes (I used 3 fresh medium-sized tomatoes)
1 can (15 oz) black beans, drained
1 can (15 oz) small white beans, drained (I used kidney beans)
2 tbsp chopped pickled jalapenos (I used 1/4 of a fresh one, some seeds included with a tbsp of vinegar)
3 large garlic cloves, minced
1/2 cup chopped fresh cilantro
1 oz semisweet chocolate (I used dairy-free)
2 tbsp cornmeal or 3 tbsp cornstarch mixed with 2 tbsp water (optional for thickening) (I omitted)

Here are Pam Anderson's directions:

1. Heat oil in a large pot over medium-high heat.
2. Add onion and bell pepper and cook, stirring until softened, about 5 minutes.
3. Add chili powder, thyme, cinnamon, and allspice. Cook, stirring constantly, until fragrant, about 1 minute.
4. Add chicken and stir to coat with spices. Add broth, tomatoes, beans, and jalapenos, bring to a boil, cover partially, reduce heat, and simmer to blend flavors, about 20 minutes.
5. Stir in garlic, cilantro, chocolate, and either cornmeal or cornstarch/water slurry if desired. If you add the cornstarch slurry, bring the heat up to medium-high and allow the chili to thicken. Turn off the heat and let stand for 5 to 10 minutes before serving.

Here are my directions: 1. Add all ingredients except the chocolate and cilantro to the crockpot. Stir well and set to low and cook for 7 hours. 2. After 7 hours, add chocolate and stir to make sure it has all melted. 3. Ladle into bowls and garnish with cilantro.

Thursday, September 23, 2010

Masala Salmon


I'm a sucker for a good deal. Especially when it comes to food. I will buy 10 avocados when I only need 2, if it saves me a few measly cents. When I saw a whole, wild caught salmon at Uwajimaya for $4.99/pound, I knew I had to get it the whole thing. $25 for a five-pound fish! I knew it would make at least four meals for us. Fortunately, the fish monger cut it up into four large fillets. One fillet is enough for the husband and I, plus a bit leftover for his lunch.

I'm also a sucker for freezing food. As soon as I got home, those fillets were tightly wrapped in plastic wrap and placed in the freezer. I've used three out of four fillets so far. The first one was poached in a green curry and coconut milk sauce, the second one was baked after being marinated in a soy, garlic, ginger mixture. Although both of those were quite good, the third time was the charm. I got the idea from Route 79. I only ended up using half of the spice mixture, and I added some garlic ginger paste I made and keep in the freezer.

When it comes to salmon, I'm usually hesitant to use anything more than salt, pepper and lemon because salmon already packs enough flavour on its own. I'm usually afraid that using too many spices will cover up the awesome richness of the fish. Fortunately, these spices didn't overpower the salmon at all. The outside had a nice fragrant flavour, but the inside was still salmon-y, even though I let it sit in the marinade for about 2 hours.


Paired with brown rice and roasted green beans and broccoli, this made a great dinner for us. Route 79 pan-fried the salmon, but I baked mine in the oven at 475 F for 12 minutes.

Masala Salmon
from Route 79 (serves 2)

Ingredients

1 salmon fillet (about 1/4 of the salmon), cut into 4 pieces
oil to coat fillet and baking sheet
1 tsp turmeric
1 tsp ground coriander
1 tsp cumin
1 tsp chili powder
2 tsp garam masala
salt for seasoning the fish

Pat fillet dry with a paper towel. Season with salt. Place in a shallow dish (like a pyrex) and drizzle with oil. Sprinkle spices evenly over the fish (I only ended up using about half of the spice mix), and using your hands, flip the fish over and move around the dish so that the spices and oil create a paste and coat the fish evenly.

Place the pieces skin-side up in the marinade, cover tightly with plastic wrap, and refrigerate for 1-2 hours.

Preheat the oven to 475 F. Place the fish pieces skin-side down on a lightly greased baking sheet. Bake for 12 minutes. Remove fish from pan, and place on paper towels to absorb the oil.

Wednesday, September 8, 2010

Thai-inspired Eggplant Stirfry

There is a seasonal eggplant dish I absolutely love at Mae Nam in Vancouver. On their menu, it says that the eggplant is fried with fermented bean paste (I'm assuming with something like miso). Doing a quick internet search didn't turn up anything, so I decided to give it a try using one of many recipes without the bean paste.

I had globe eggplants on hand. Some websites said globe eggplants would be fine in this dish, other said the skin would be too thick, or that the texture wouldn't be very good. I found that using globe eggplants didn't affect the texture much, but the skin was noticeable. The skin wasn't too hard or tough, but it was just... there. I definitely think I'll use the skinny eggplants next time.

The original recipe didn't call for ginger, but I added it in, and I think it gave the dish an extra something. I also added dried red chili flakes because I forgot to grab fresh chilies at the market earlier today.

I also added some fresh red bell pepper (it was starting to get a bit wrinkly) and some blanched green beans, too. The result was a fragrant dish that was slightly salty, zingy from the ginger, a little fiery from the chilies, and just overall tasty!

So here it is!

Eggplant Stirfry (Pud Makua Yow)
Adapted from http://www.thaitable.com/Thai/recipes/Basil_Eggplant.htm

1 tbsp vegetable oil
1 bunch thai basil
1 tbsp sugar
2 cloves garlic, finely chopped
2 tbsp fish sauce
2 asian eggplants
2 chili peppers

I added:
3/4 inch piece of ginger, finely chopped
1/4 red bell pepper, sliced
1 handful blanched green beans

Slice the eggplants into irregular shapes for easy turning in the pan. When it's sliced into a small disk, it tends to stick to the bottom of the pan and makes it difficult to flip or turn.

Chop garlic (and ginger, if using) and slice chili peppers. Pick the leaves from the stem of the Thai basil.

Heat a pan or wok over high or medium high. Add oil, chili peppers and garlic. Stir until the garlic turns golden brown. Add eggplant and stir to coat. Add 3/4 cup of water and cover the pan or wok with a lid. Keep the lid close until the eggplant is cooked. It should take about 5-7 minutes before the eggplant is done. The eggplant turns from white to translucent when it is done. Almost all of the water should have been evaporated at this point. If the eggplant is still not cooked, add a little bit more water and keep lid closed until the eggplant is ready. Add fish sauce and sugar and stir. Add Thai basil and quickly stir to heat the basil, so that it retains it color. Turn off heat immediately.

Serve hot with rice.

Thursday, September 2, 2010

Italian sausage, leek, and potato soup

This is one of those I-bought-more-veggies than-I-know-what-to-do-with meals. The one veggie I didn't know what to do with? Leeks. I'm not even sure which is the usable part. A lot of recipes say to chop off the dark green part, and then go on to tell you that they can be used for something else. Well, I ended up removing most of the green part. I chose to puree the soup with a hand blender, but if you chop the veggies smaller, it can be left unblended.

I think the sausage I used must've been pretty salty because I didn't need to season it much. Even though there is no milk or cream in this soup, it comes out very rich-tasting and creamy-feeling. I will definitely be making this again!

Ingredients:
Makes 4 large bowls of thick soup.

2 tbsp of olive oil
Leeks, 3, thoroughly rinsed and chopped
3 italian sausage links, removed from casing
1 large yukon gold potato, peeled, rinsed and chopped
1/4 head of cabbage, chopped
4 cups chicken stock

Heat the a large saucepan on medium-high heat. Heat up the olive oil, and add the sausages, crumbling with a wooden spoon as they cook. Once the sausages have cooked, remove with a slotted spoon and set aside.

Add the potatoes, leeks and cabbage and cook until all vegetables start to soften, about 5 minutes. Add the chicken stock. Bring to a boil, reduce heat, and simmer for 30 minutes.

If you are using a hand blender, turn off the heat, and puree the soup until it reaches the desired consistency. I left mine just a little chunky. Add the cooked sausage bits from before and stir. If you would like a thinner soup, add more chicken stock or water, and reheat before serving.

Sunday, May 9, 2010

Sweet Potato Spoon Bread with Goat Cheese

I crumbled more goat cheese on top. Thank goodness to for big bulk logs of this stuff!

I had no idea what spoon bread was until I made this dish. The cookbook is got the recipe from, didn't have pictures so I really had to guess. It was the ingredients that made me want to try this one out.

Apparently, red-fleshed sweet-potatoes are mistakenly referred to, and labeled as yams. I went to the store and bought what was labeled as "sweet potatoes" but really what I should've bought were yams. No biggie, because it still turned out delicious!

Heidi Swanson's recipe calls for goat cheese (which I love!) and that is what appealed to at first glance. I loooooove how the cheese gets all creamy when baked. The tanginess of the cheese and the sweetness of the potatoes are a perfect balance. The recipe calls for shallots, which I don't use very often. I don't know if it's just the nature of shallots or if the particular shallots I bought were really strong tasting, but I found they added almost a pungent bitter, acidic taste. I would definitely replace this with onions, or just reduce the number of shallots in the future.

Melty goat cheese = good! Not-quite-set middle section = not good...
Next time, I shall use a larger casserole dish so the spoon bread will be thinner.

I baked mine for about 35 minutes but found the middle to be not quite set. The sides of the dish were perfect, and the goat cheese had browned beautifully, though.

Yellow sweet potatoes tasted fine for this spoon bread but I can see why this recipe would call for red ones. Next time, I will ignore the supermarket labels and buy the right potato!


Sweet Potato Spoon Bread
Super Natural Cooking by Heidi Swanson

Ingredients:

3 medium - large red-fleshed sweet potatoes, baked (labeled as "yams")
1/3 cup unsalted butter (I used olive oil)
4 large shallots, sliced into thin rings
6 ounces fresh goat cheese
3/4 cup whole wheat pastry flour (I used 1/4 cup cornmeal, and 1/2 cup spelt flour)
1 tsp onion powder
1 tsp salt
Freshly ground black pepper
I cup boiling water
3 large eggs, beaten
Freshly grated Parmesan cheese, for garnish (omitted)

Preheat oven to 350F, position a rack in the middle of the oven, and grease a 2 quart casserole dish.

Prick each sweet potato with a fork a few times, then wrap them in foil. Prick foiled potatoes, this time to let steam escape. Bake for 1 to 1 1/2 hours, until the potatoes are fork-tender. Cool until they can be handled, then use a big, wide spoon to scoop the flesh in to large bowl. Increase oven temp to 425F.

Heat the butter in a skillet over medium heat, then stir in the shallots. Cook, stirring frequently, until the shallots are golden and the butter has browned, about 9 minutes.

Whisk or blend the goat cheese with a fork until fluffy and light; you may need to add 1 or 2 tbsp of water if the cheese is on the dry side. In a large bowl, combine the flour, onion powder, salt, and a few grinds of pepper. Add a splash of the boiling water and stir to make a paste. Continue adding water a bit at a time until it is all incorporated, and don't worry if the batter is a bit lumpy. Add the sweet potatoes and mash. Stir in the sauteed shallots and all of the butter in the pan, then stir in the eggs in sections.

Put two-thirds of the potato mixture in the prepared casserole dish, and top with dollops of the whipped goat cheese. Finish with dollops of the remaining sweet potato mixture. Bake for 30-35 minutes, until goat cheese begins to colour and the potatoes have set.

Saturday, March 6, 2010

Curried Carrot Soup


I looooove carrot soup! I've tinkered around with several different recipes, which sometimes had not-so-great results (too spicy, too bland, etc), but this recipe from Martha Stewart's Great Food Fast was very well balanced. I have to admit though, I did tinker with this recipe, too!

Instead of 2 pounds of carrots like the recipe calls for, I used about 1.5, and added 4 oven roasted roma tomatoes. I love the tangy flavour they add.

I didn't taste much curry in this soup. I didn't mind that, but I might add garam masala instead if I want more of a curry flavour. Who knows, maybe the tanginess of the tomatoes took away from it.

Ingredients:
Source: Martha Stewart's Great Food Fast
Serves

2 tablespoons butter (I used Earth Balance)
1 cup chopped onion
1 teaspoon curry powder
Coarse salt and fresh ground pepper
3 cups chicken broth
2 pounds carrots, peeled and cut into 1 inch chunks (I used 1.5 pounds)
1 to 2 tablespoons fresh lemon juice
2 tablespoons coarsely chopped fresh cilantro (omitted)
(I added 4 roasted roma tomatoes)

Preheat oven to 350F. Prep vegetables while oven preheats. Cut tomatoes in half, and scoop out seeds using a spoon. Arrange tomatoes on an olive-oil greased oven-proof dish. Season with sea salt and fresh ground pepper. Roast for 30 minutes, flipping halfway through.

Heat the butter in a Dutch oven or large (4- to 5-quart) saucepan over medium heat. Add the onion, curry powder, 2 teaspoons salt, and 1/4 teaspoons pepper. Cook, stirring occasionally until the onion is soft, about 5 minutes. Add tomatoes, and set the roasting pan aside.

Add the broth, carrots, and 3 cups water. Add some of the water to the pan used to roast the tomatoes, and scrape all those wonderful cooked-on bits, and pour in the saucepan. Bring to a boil. Reduce the heat; cover, and simmer until the carrots are tender, about 20 minutes.

In a blender, puree the soup in batches until smooth (I used a hand blender). Stir in lemon juice, and garnish with cilantro (if using).

Tuesday, November 24, 2009

Leftover pantry/fridge/freezer stuff soup

On a rainy, windy Sunday, the last thing you want to do is go outside to buy groceries, holding your loaded shopping bag in one hand, an umbrella in the other, trying not to get rain in your face (yes, it was that kind of rain). Some stuff I had lying around: frozen ground turkey, dried black beans, dried chick peas, red curry paste, and fresh corn on the cob.

OK, I admit, this soup would require a bit of planning (maybe the morning of) but it's mostly stuff that you'd leave to soak and thaw. If you happened to have canned beans, this would be a lot easier since a lot of time goes into soaking and cooking the beans. I would not really expect anyone to go out and buy these ingredients just to make this soup. But, I hope you can see what I had in my kitchen to make a very filling soup for yourself.

So here it is:

Spicy Turkey Bean Soup

1/2 cup dried black beans (mine soaked for 4 hours)
1/2 cup dried chick peas (mine soaked for 4 hours)
1 pound ground turkey breast
1/2 large onion diced
2 large garlic cloves, minced
2 tbsp ginger root, peeled and minced
1 carrot, diced
2 celery stalks, diced
2 cobs of corn, kernels cut off with a sharp knife
2 tbsp red curry paste
4 cups stock
1/3 cup fresh cilantro, chopped

In a large pot, cover black beans and chick peas with water and bring to a boil over med-high heat. Reduce to med-low and simmer, covered until the beans are soft. This took about 1-2 hours for me. I used this time to check my e-mail. Once the beans are soft, drain and set aside.

In a large saucepan, heat oil, and saute onion, garlic, and ginger until softenend, about 5 minutes.
Add the curry paste and 1 cup of the stock, mixing well. Add carrots, celery, corn, and beans, and cover, cooking until carrots are somewhat tender.

Add remaining stock and bring to a boil. Reduce and simmer, covered for 10 minutes. Stir in cilantro, and season with salt and pepper as desired (1/2 tsp each?)

You could also add 3 tbsp of fish sauce for more flavour.

Spicy Carrot and Lentil Curry Soup

A definite winter soup! Thick, hearty, warm-your-body goodness with vitamin A and protein! I chose to blend my soup with an immersion blender for a smoother soup. The problem with blending carrots and lentils is that they end up looking like barf. I took this soup to work a few times last week and got some curious stares. If you get queasy easily, maybe just chop everything up very fine and leave it unblended!

This would be delicious with some hot naan bread, or rice.

From Alive Magazine (November 2009 Issue)

Ingredients:
1 tbsp olive oil
2 cups diced onions
3 large garlic cloves, minced
2 tbsp fresh ginger root, peeled and minced
1 tbsp red curry paste
4 cups stock (veg or meat, your choice)
2 cups carrots, peeled and diced
1/8 tsp crushed red pepper
1 cup dried split red lentils
1 cup frozen shelled edamame beans, thawed
1/3 cup fresh cilantro, chopped
1/2 tsp salt
Fresh ground pepper

Heat oil in a large saucepan over med-high heat. Add onion, garlic, and ginger; saute for 5 minutes or until soft and translucent. Stir occasionally.

Stir in curry paste and 1 cup of the stock to blend. Add carrots and crushed red pepper. reduce heat to med-low . Cover and cook until carrots are crisply tender, about 5 minutes. Stir.

Add remaining stock, lentils, and edamame beans and bring to a boil. Cover, reduce heat, and simmer for 10 minutes until lentils are tender. Stir in cilantro, salt, and pepper.

Spoon into individual serving bowls and garnish with additional cilantro and/or sour cream or plain yogurt.


Wednesday, November 11, 2009

How to incorporate a skin-on, bone-in chicken breast...

... into your soup! Skin-on, bone-in chicken is always cheaper at the supermarket. Maybe it's because they're sold by weight and so they work out how much the extra bone and skin would weigh? Or it's because they don't have to pay someone to skin and bone the chicken breast? Who knows... I've never tried to de-bone a raw chicken before but just imagine it's just much easier to do when it's cooked.

The idea behind this meal was to cook the chicken, get broth from the skin and bone, and then get the meat off the bone. It worked pretty well so I'll definitely do this again for other soups. Tonight's soup was:

Chicken Tortilla Soup
Adapted from Que Pasa tortilla chip bag
Yield: 4-6 generous servings

2 tablespoons olive oil
1 medium onion, chopped
3 cloves garlic, chopped
1 serrano pepper, seeded and chopped
1 jalapeno pepper, chopped (you can keep or discard the seeds depending on how hot you'd like it)
1 1/2 teaspoons ground cumin
1/2 teaspoon ground coriander
1 tablespoon tomato paste
1 medium tomato, chopped

6 cups water
1 can black refried beans
1/4 cup chopped fresh cilantro leaves
juice of 1 lime
1 skin-on, bone-in chicken breast


Directions
Heat a heavy bottomed, large soup pot on medium-high heat. Add 2 tablespoons of oil, and place the chicken breast, skin side down. Sear for about 2 minutes, then flip and sear for an additional 2 minutes.
Add the onions, garlic, peppers, cumin, and coriander for 5 minutes. Stir to make sure the onions absorb the chicken-y goodness!
Add the tomato paste and cook, stirring, for 1 minute.
Add the chopped tomatoes and water and bring to a simmer. Simmer for 20 minutes.
Remove the chicken breast and place on a plate to cool.
Add refried beans (optional: for a smoother soup, use an immersion blender)
Once the chicken has cool, remove the skin and bone. Chop or shred chicken to desired thickness/size. Add the chicken back into the soup.
Add the cilantro and lime juice, and stir well. Season the soup with salt and pepper.
Serve with guacamole, tortilla chips and garnish with cheese and/or sour cream (if you eat dairy).

It was a pretty good soup with a decent amount of flavour. I think it could have been a little better if it had more chicken flavour. Maybe I'll use 3 cups water, and 3 cups chicken stock next time...

Saturday, May 23, 2009

Roasted Eggplant and Dill and Potato, aka Baigan Ka Bartha and Aloo Soa Ki Subzi

It was Saturday night and the husband and I planned to make some dinner using recipes from our new(ish) cookbook "Everything Indian Cookbook by Monica Bhide, 2004.

I LOVE Indian food but am always hesitant to make it home because some the ingredients are hard to get, or because I don't want to buy a whole jar a of tamarind paste or whatever and have to eventually throw it out. Also, it never tastes like what I have at the restaurants. But with the 2 recipes in this title, I felt it was doable because we happened to have all the ingredients on hand, or knew we could get them at the local Safeway (BTW, Thriftway, we miss you!)

Roasted Eggplant (Baigan Ka Bharta) from "Everythin Indian Cookbook"


3 pounds eggplant (we used 2 large ones)
4 tablespoons vegetable oil
1 small onion, peeled and chopped roughly
1 tsp Ginger-Garlic paste (recipe below)
1/4 tsp red chili powder
1 tsp coriander powder
2 medium tomatoes, finely chopped
Salt, to taste
Fresh chopped coriander, for garnish (optional)

1. Preheat oven to 475. (I used the broiler and but the oven rack to the second highest position).

2. Rub 2 tablespoons of the oil on the eggplants on a baking sheets and place in the oven. Cook until the eggplant is soft and the skin is charred. Turn occasionally so all sides get charred. Remove from oven to cool.

3. Once eggplants are cooled, peel and discard skin. Mash the eggplant with a fork into a smooth pulp. Set aside.

4. In a large skillet, heat the reamining 2 tbsp of oil over medium heat. Add th eonions and saute until they are transparent. Add the Ginger-Garlic Paste, red chili powder, and coriander powder, saute for 30 seconds.

5. Add the tomatoes and saute for about 5 minutes, stirring constantly. Use the back of your spoon or spatula to mash the tomatoes. When the mixture is ready, oil will start to separate from the mixture (mine never did this so I went ahead to the next step).

6. Add the eggplant and mix well. Add salt to taste and fry for about 7 - 10 minutes stirring constantly. Remove from heat, garnish with fresh coriander and serve with basmati rice.

I order this every.single.time. at our local Naan 'n Curry and love it so much. This version was OK. Don't get me wrong, the balance of spice with the eggplant and tomato was really nice, but I was looking for something with more oomph, more kick, more flavour. I think next time, I'll add more ginger-garlic paste or maybe add curry powder or garam masala or something. Maybe even a chili.

Ginger-Garlic Paste From "Everything Indian Cookbook"

2 serrano chilies (optional)
1/2 cup gingerroot, peeled
1/2 cup garlic cloves, peeled
1 tbsp cold water

1. Remove the stems from the green chilies (if using)

2. Place all ingredients in a food processor and puree to form a smooth paste. Add mo more than 1 tbsp of water to help form a smooth consistency.

3. Store the paste in an airtight jar in the refrigerator. The paste will keep for up to 2 weeks.

We put ours in a glass Pyrex container with lid. We put plastic wrap to keep any air out and have kept it in the freezer for about a month now. You could probably halve or quarter this recipe since you really only seem to use about a tsp or so for each recipe!

Dill and Potato (Aloo Soa Ki Subzi) From "Everything Indian Cookbook"


2 tbsp vegetable oil
1/2 tsp cumin seeds (we only had ground cumin so we used about 1/8 tsp of that)
2 green chilies, seeded and minced (we used serrano chilies)
2 large russet potatoes (or 3 medium) peeled and diced
1/2 cup frozen peas (we omitted these)
1/4 cup chopped fresh dill
1/4 tsp turmuric powder
salt, to taste
water, as needed

1. In a large skillet, heat the oil on medium. Add the cumin seeds (or ground cumin). When they begin to crackle (or when ground cumin becomes fragrant), add the freen chilies; saute for 10 seconds.

2. Add the potatoes and saute for about 2 minutes. Add the peas, dill, turmeric, and salt; saute for another 2 minutes.

3. Add a few tablespoons of water (the husband added 4), cover and cook on low heat until the potatoes are cooked through, about 10 - 12 minutes.

How can you go wrong with potatoes and dill? This dish was fine, but next time, I might add some curry powder or garam masala for more flavour. We kind of added salt as we ate since the recipe doesn't tell you exactly how much to add.

Tuesday, May 12, 2009

Wine Night


The hubs and I have been keeping a particular bottle of wine for a special weekend. By special, I don't mean an anniversary or birthday but a weekend where we have no plans, can start drinking early in the evening so we can enjoy the sunset, and can have enough time to make some food to go well with the wine.

Matthews Estate 2005 Claret:


This wine was described to us as a "big, chewy red" (see my earlier post titled, "The Wines of King County" for details) and I really don't know enough fancy shmancy wine lingo to describe it. It definitely had a full flavour with enough acidity to make your mouth water a little while you held it in your mouth.

I can truly say that I researched high and low for what would go well with this special wine. I know what you're thinking, "easy, some cheese and crusty french bread!" Well yeah, but what if we don't eat wheat or cow products? "Ohhhhh... well that makes a big difference!"

The one with the black wax (?) is manchego, and the one that is diced finely is the pecorino romano.


Have no fear, we found 2 sheep's milk cheeses: pecorino romano, and manchego. Here was our menu for our much anticipated night with Matthews Estate 2005 Claret:

Tomatoes with olive oil and fresh basil atop slices of manchego cheese
Grilled portabello mushrooms and red bell peppers
Rice pasta in olive oil with garlic, olive tapenade, and pecorino romano.


The tomatoes should be self explanatory! We used 2 medium sized vine-ripened ones.

For the grilled mushrooms and bell peppers, I brushed them with olive oil, seasoned them with salt, and sprinkled a bit of balsamic vinegar on them. We used them on the George Foreman because our BBQ wasn't working (boo!) so if you can BBQ them, do it until all the liquid evaporates from the mushrooms.

For the pasta, it didn't quite work as planned. We used rice spaghetti and the water we cooked it in got really sludgy, and so the spaghetti was pretty sludgy. I rinsed it with cold water to wash the sludge off but now the pasta was cold! The idea was for the hot pasta to warm the olive tapenade and melt the pecorino romano a little. Not ours. It just sat there looking cold so I threw it in a frying pan to heat it up a bit. After it heated up, it was delicious!

If you're using wheat pasta, you won't have this problem so cook as much pasta as you need, drain and while still hot, toss it with olive oil, a few tablespoons of olive tapenade, and as much or as little pecorino romano (or similar cheese like parmesan) and let stand for a few minutes while the cheese softens and melts.

Of all out dishes, I though the tomato/fresh basil/manchego went best with the Claret, but the Hubs thought the pasta paired best.

Sorry for the unspecific quantities for the dishes, but just keep tasting adn testing until you get the level of saltiness you like!

Monday, April 13, 2009

Black Bean Soup

After a long weekend (gotta love Easter) full of rich foods and wine, my body was craving something simple, nutritious, and filling. Black bean soup! This is something I threw together with things I had lying around the house. SO not in the mood to shop on Easter Monday. I added miso paste for depth and saltiness.

Being of Japanese descent, this is something I always have in the fridge. You could definitely use chicken stock or some other kind of stock but would have to play around with the seasonings a bit. Oh, I also used an immersion hand-blender (gotta love those things!)

Lazy day black bean soup

1 1/2 cups dried black beans (soaked over night, simmered for 2 hours until soft, drained)
1 onion, chopped
2-3 cloves garlic, chopped
1 - 1 1/2 inch piece of ginger, peeled and chopped
2 tablespoons miso paste (I think red or white would be fine)
soy sauce, to taste.
Cilantro sprigs (optional)

In a large pot, heat up some oil over med-high and saute the garlic, onions and ginger until the onions are translucent.
Add the black beans, stirring in incorporate onion/garlic/ginger flavours for about 2 minutes.
Add 2 cups water and miso.
Bring to a boil stirring occasionally to help miso dissolve.
After miso has dissolved, simmer for about 5 minutes. Add as much or as little soy sauce depending on how salty you 'd like it to be. You can add more water for for a thinner soup.
Being very careful that the blender is fully submerged in the liquid, pulse until desired consistency is reached. I like it pretty well blended. It's better to stop the blender before moving it around the pot. And never life the blender up while you're still blending, otherwise you'll end up wearing the soup!
Garnish with cilantro.

Enjoy!

You could even add some heat to this by adding a few green chiles. I decided to keep mine heat-free to help my body cleanse a little but will definitely be trying this recipe again with some chiles.

Saturday, March 21, 2009

Thai-style Coconut Soup

Emphasis on the "-style" as I don't think this is very authentic. I love Thai coconut soups. The combination of creamy, sweet, salty, hot and sour is just heaven for me. In this version, I left out the "hot" part because I was making it for my mom and she doesn't do hot. At all. Ever...

I used stuff I had around the house: carrots, celery, onions, lemon grass (actually I saw that at the store and decided to pick it up) and of all things, green lentils. I don't think I've ever had a Thai dish with lentils in it. But anyway, as I said, this soup is not Thai, just has some "borrowed" elements from it.

I'll probably try to recreate the soup and add noodles or seafood another time. I'll also add some spice to it, too!

Thai-style Coconut Soup

1 large yellow onion
1 1 1/2 inch piece of ginger, sliced into strips
2 carrots, chopped
2 stalks of celery, chopped
1 chicken breast, chopped into bite-sized pieces
3/4 cup lentils, rinsed and drained
1 stalk (?) lemon grass, chopped into three pieces and smashed with the dull side of a knife
1 can coconut milk
juice and grated rind of 1 lime
2 tbsp fish sauce
2 tbsp sugar
salt and/or pepper

Heat 2 tablespoons of oil on medium-high heat (I used coconut hoping to capture its fragrance) and fry the onions, carrots, celery, and ginger until softened. Add lentils.

Add 2 cups water, the lemon grass pieces and bring to a boil. Reduce heat and cook until lentils are soft. Add chicken pieces and simmer until they are white and cooked through.

Add coconut milk and simmer for about 5 minutes. Add lime juice, fish sauce, sugar, and zest. Stir to combine flavours. Add salt and/or pepper to season to your liking.

Serve with cilantro sprigs and enjoy!

*I'm not really sure how to use the lemon grass. I should look that up!

Monday, March 9, 2009

Japanese Hot Pot aka Nabe

That's pronounced "nub-eh" not "nayb". Nabe can be a dish or a dish. What I mean is, it can be a meal and it can also refer to the ceramic pot you cook it in.

I grew up on this comfort food and anytime I was away from home for long periods of time, it was one of the foods I'd really miss. There are as many variations on this dish as there are for "meatloaf" or "tuna casserole" so other people will do something completely different than what I do. And that's OK! There's no right or wrong way. As long as it tastes good and gets the family or friends around the table, the recipe doesn't even matter. It does consist of a few parts though: protein, vegetables, and starch/carbs.

For protein, my mom would usually use chicken thighs or wings to make a stock(with the skin and bone on for more flavour). Then she'd usually get a few variations of Chinese greens like bok choy, choy sum, napa and cabbage. Most leafy or stalky greens will work.  I always slice some carrots on an angle for colour and flavour. I also like to add enoki mushrooms (the long skinny white thingys in the pic below), tofu, and konnyaku thread bunches (and sometime udon, if we have guests). You can also add leeks and other greens you'd normally put in a soup.


To start off, I put about 2 -3 sheets of kombu (dried sea kelp) in a large stockpot of water. I let this sit on a low-med heat while I chop the vegetables into bite-sized pieces. The kombu is very concentrated with flavour and you'll see the water turn a golden tinge after it's been sitting in there for a while.

Something I did recently is make pork meatballs using about 1/2 - 1 pound of lean ground pork, 1-2 chopped garlic clove (depending on how garlicky you like it), 1 tbsp of finely chopped ginger and salt and pepper. You can leave the bowl of raw ground meat at the table and cook as you go (using 2 large spoons to form balls, dropping them into the pot as you go), but if the sight of raw meat makes you sick, you can boil these meatballs in the kombu broth ahead of time so that they're all ready to go and the broth is nicely flavoured. Your choice.  If you can find sukiyaki style beef or pork (sliced thin), that cooks very quickly and is easy, too.

I like to use the nabe (the pot) for aesthetic purposes but if you don't have one, you can use a stock/soup pot. Just be sure you can easily reach into it to grab stuff out. It would be best to use one that's not too deep.


We've got it on a single burner (behind the sauces) and bring it to a boil. Then put in your meat (unless you are using pieces with skin and bones attached. Those will take longer so you'll need to cook them in the stock before you start serving), vegetables, tofu, noodles, etc and wait until the meat is cooked thoroughly. Add whatever condiments to your bowl (we usually go for kimchee base [centre] and roasted sesame paste[left]) and when the meat and veggies are ready, dig into the big pot and grab what you like (you can designate a pair of "pot only" chopsticks for germophobes) and ladle in some of the soup, too. Make sure the sauces are well mixed in and enjoy! Usually someone is on refill duty (in our home, that's me) and will stock up the pot so the next batch can cook while everyone's eating.


I grew up finishing the meal off with noodles (like cooked vermicelli and udon) but some like to use cooked, cooled rice (like leftover rice). By the end of the meal, the soup is very nicely flavoured with meat and veggie essences and all this seeps into the starch and makes for a delicious filler-of-the-cracks in your tummy. If you're using rice, some people like to crack an egg into the pot and let that cook in the broth. The leftover soup-egg-veggie bits makes for a really good breakfast the next morning!

There are variation on the nabe stock, too. People also use soymilk in the stock for a creamier broth, and I've even heard that curry nabe is somewhat of a rage in Japan. There isn't really a right or wrong way. The most important thing is that it tastes good to you!